
http://www.unixmen.com/openldap-installation-configuration-ubuntu-12-1013-0413-10-debian-67-2/
OpenLDAP Installation and Configuration in Ubuntu 12.10 Server / Debian 6


OpenLDAP is a free open source Light Weight Directory Access protocol developed by the OpenLDAP project. It is a platform independent protocol, so that it runs on all Linux/Unix like systems, Windows, AIX, Solaris and Android.
In this tutorial i am gonna to show you how to install and configure OpenLDAP server in Ubuntu 12.10 server. Though it is tested on Ubuntu 12.10, it may work on Debian too. In this how-to my testbox details are given below.
Operating System : Ubuntu 12.10 Server
Hostname         : server.unixmen.com
IP Address       : 192.168.1.200
Replace the above values with your own scenario.
Install OpenLDAP in Ubuntu 12.10 server
unixmen@server:~$ sudo apt-get install slapd ldap-utils
During the installtion it will ask the password for LDAP admin account. Enter your admin password here.

Re-enter the password.

Configure OpenLDAP
Open the “/etc/ldap/ldap.conf” file and find and edit the lines as shown below with your domain name and IP Address.
unixmen@server:~$ sudo vi /etc/ldap/ldap.conf
#
# LDAP Defaults
#
# See ldap.conf(5) for details
# This file should be world readable but not world writable.
BASE    dc=unixmen,dc=com
URI     ldap://192.168.1.200
#SIZELIMIT      12
#TIMELIMIT      15
#DEREF          never
# TLS certificates (needed for GnuTLS)
TLS_CACERT      /etc/ssl/certs/ca-certificates.crt
Run the Configuration assistant.
unixmen@server:~$ sudo dpkg-reconfigure slapd
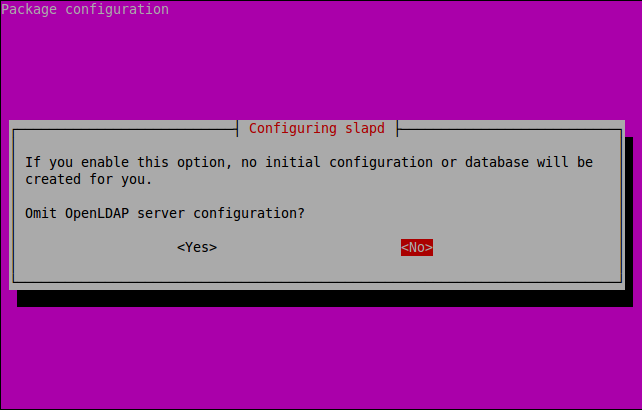
The following screen should appear. Select “No” and press Enter.
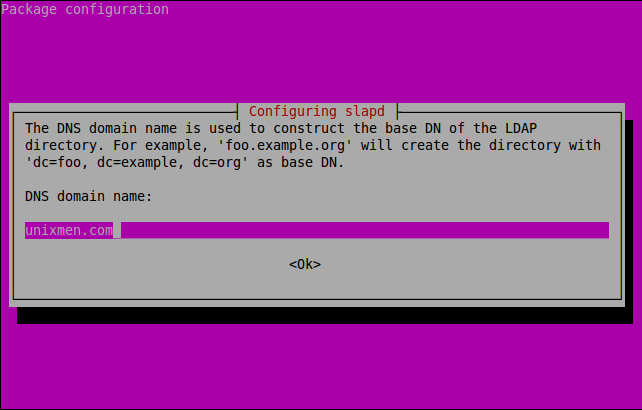
Enter the DNS domain name.
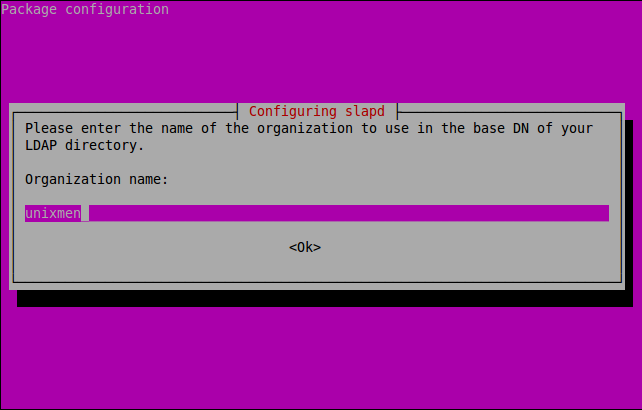
Enter the Organization name(i.e your company name).
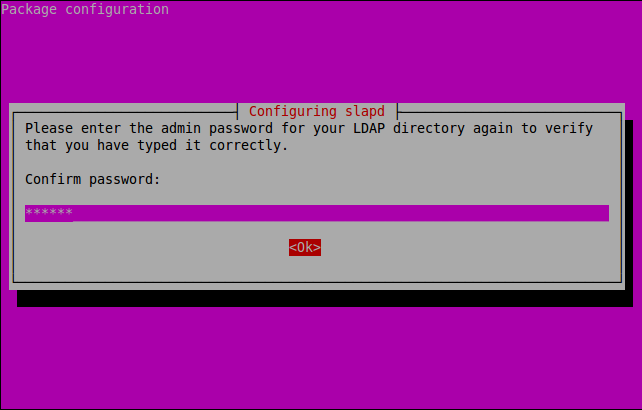
Enter the LDAP admin password which you created in the earlier step.

Re-enter the password.
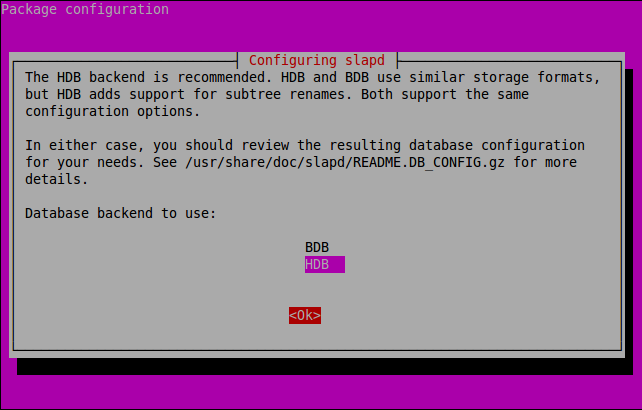
Select the backend database.
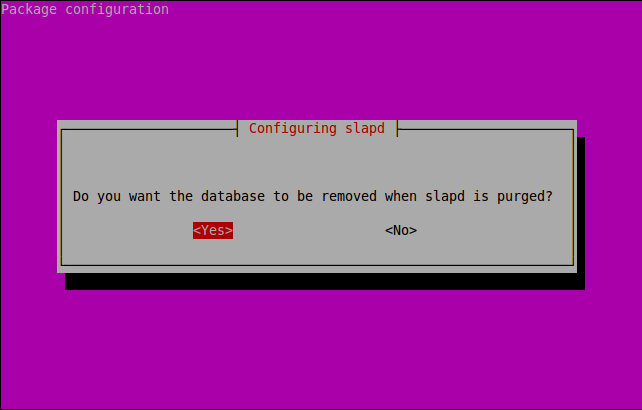
Select Yes to delete the database automatically when we are planning to remove LDAP server.
 .
.
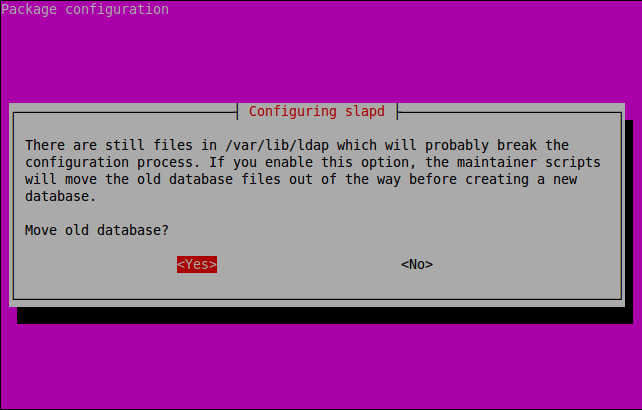
Select Yes to move old database.
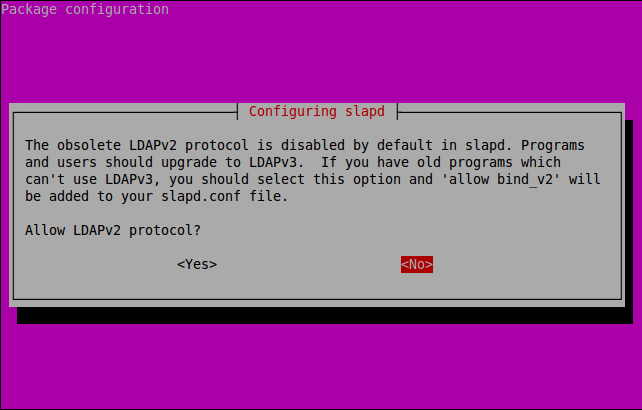
Select No and Press Enter.
LDAP server is up and running now.
Test LDAP server
Enter the following command “ldapsearch -x”, then you will have the following result.
unixmen@server:~$ ldapsearch -x
# extended LDIF
#
# LDAPv3
# base <dc=unixmen,dc=com> (default) with scope subtree
# filter: (objectclass=*)
# requesting: ALL
#

# unixmen.com
dn: dc=unixmen,dc=com
objectClass: top
objectClass: dcObject
objectClass: organization
o: unixmen
dc: unixmen

# admin, unixmen.com
dn: cn=admin,dc=unixmen,dc=com
objectClass: simpleSecurityObject
objectClass: organizationalRole
cn: admin
description: LDAP administrator

# search result
search: 2
result: 0 Success

# numResponses: 3
# numEntries: 2
LDAP Server Administration
Administration of LDAP server in command mode is quite difficult, so that here i have used a easier GUI administration tool called “phpldapadmin”.
Install phpldapadmin
unixmen@server:~$ sudo apt-get install phpldapadmin
Create a symbolic link for phpldapadmin directory.
unixmen@server:~$ sudo ln -s /usr/share/phpldapadmin/ /var/www/phpldapadmin
Now open the “/etc/phpldapadmin/config.php” file and replace the domain names with your own values. Goto “Define LDAP Servers” section in the config file and edit the following lines as shown below.
unixmen@server:~$ sudo vi /etc/phpldapadmin/config.php
$servers = new Datastore();
$servers->newServer('ldap_pla');
$servers->setValue('server','name','Unixmen LDAP Server');
$servers->setValue('server','host','192.168.1.200');
$servers->setValue('server','base',array('dc=unixmen,dc=com'));
$servers->setValue('login','bind_id','cn=admin,dc=unixmen,dc=com');
Restart the apache service.
unixmen@server:~$ sudo /etc/init.d/apache2 restart
Make sure that you have opened apache server port “80” and LDAP default port “389” in your firewall/router configuration.
unixmen@server:~$ sudo ufw allow 80
Rules updated
Rules updated (v6)
unixmen@server:~$ sudo ufw allow 389
Rules updated
Rules updated (v6)
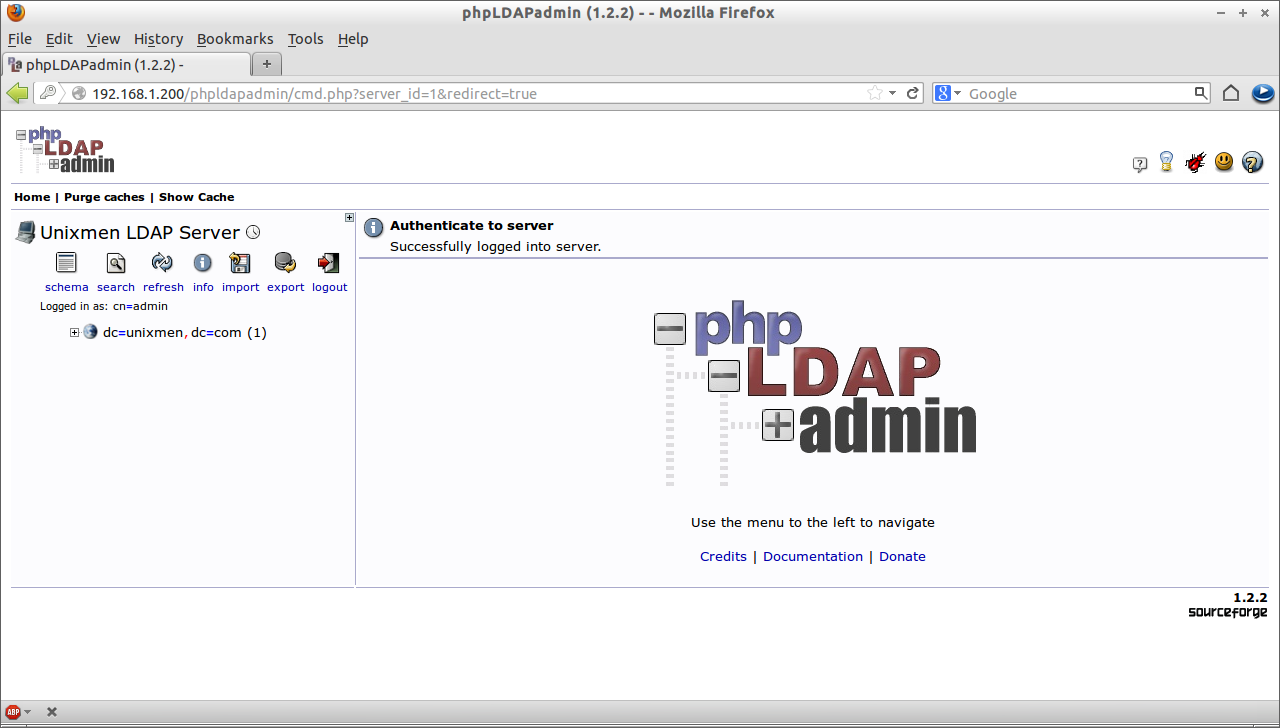
Now point your web browser with “http://192.168.1.200/phpldapadmin”. The following screen should appear.

Click “login” on the left pane and make sure the domain details are correct and enter ldap admin password which you have created in the previous steps and press “Authenticate”.

Now the main console screen of phpldapadmin will open. You can see the LDAP domain “unixmen.com” will be found there. Here you can add objects such as Organizational Unit, Users and groups etc.
Sample Configuration
Lets create some sample objects using phpldapadmin interface and check them whether they are presented in the LDAP server configuration.
Click on the “+” sign near the line “dc=unixmen” and click “Create new entry here” link.

Select “Generic-Organizational Unit” and enter the name of the Organizational unit(Ex.sales) and Click “Create Object”.
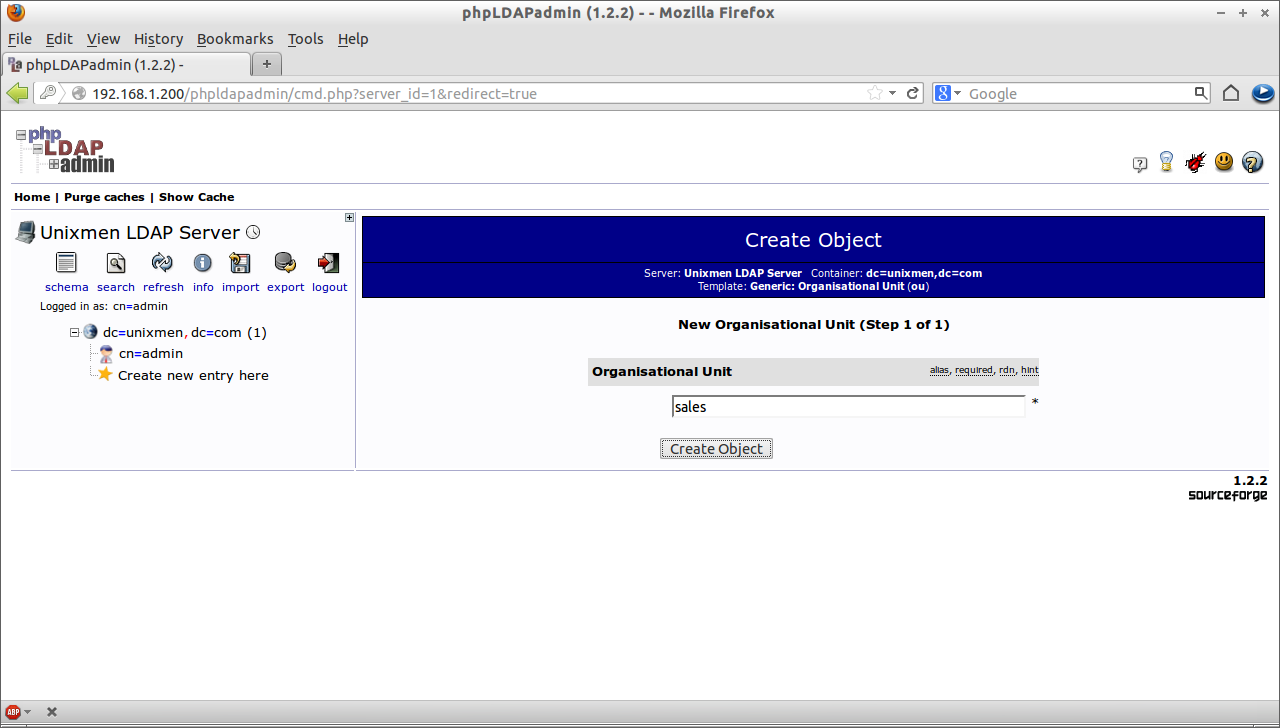
Click “Commit”.

Now the newly created OU will be found under the main ldap domain.
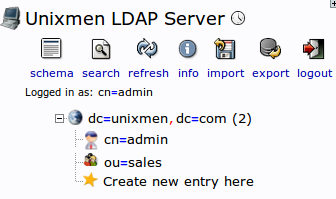
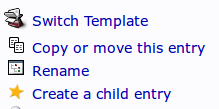
Click on the sales ou tree on the left pane and click on “Create a child entry”.
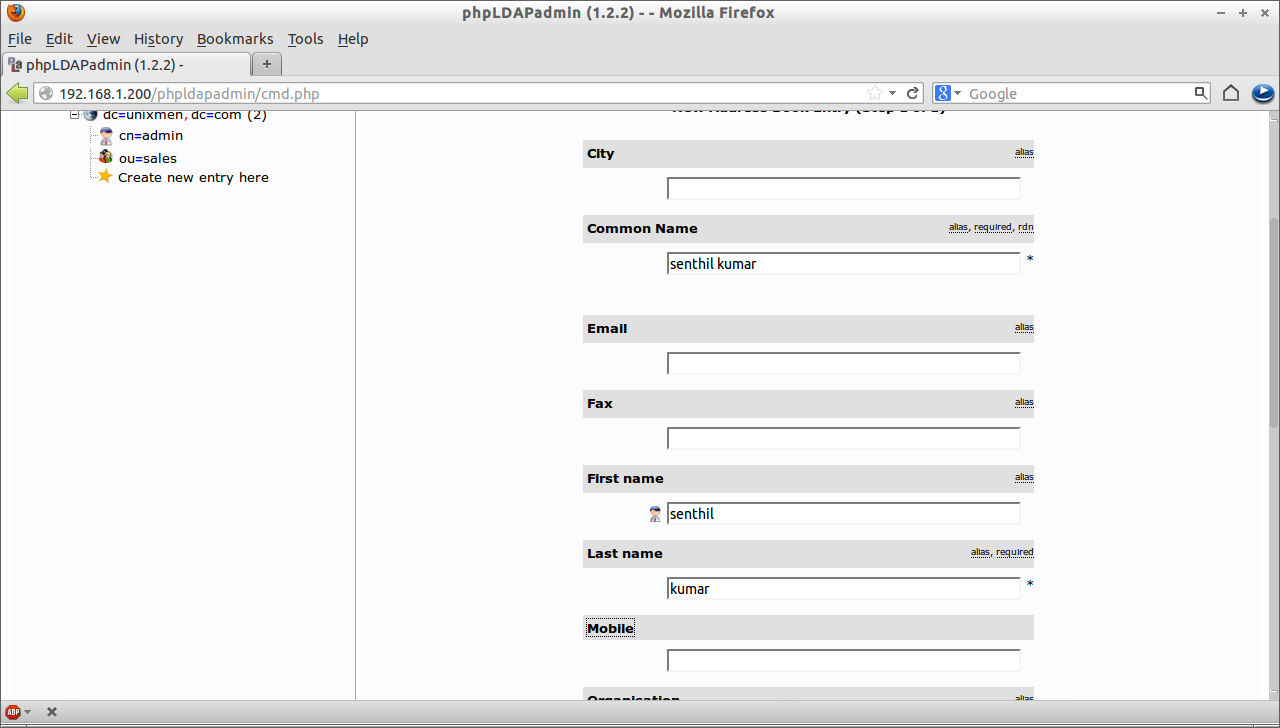
Select “Generic:Address book entry”. Enter firstname as “senthil”, last name as “kumar” and Common name(cn) as “senthil kumar” and click “Create Object”.
Click “Commit”.
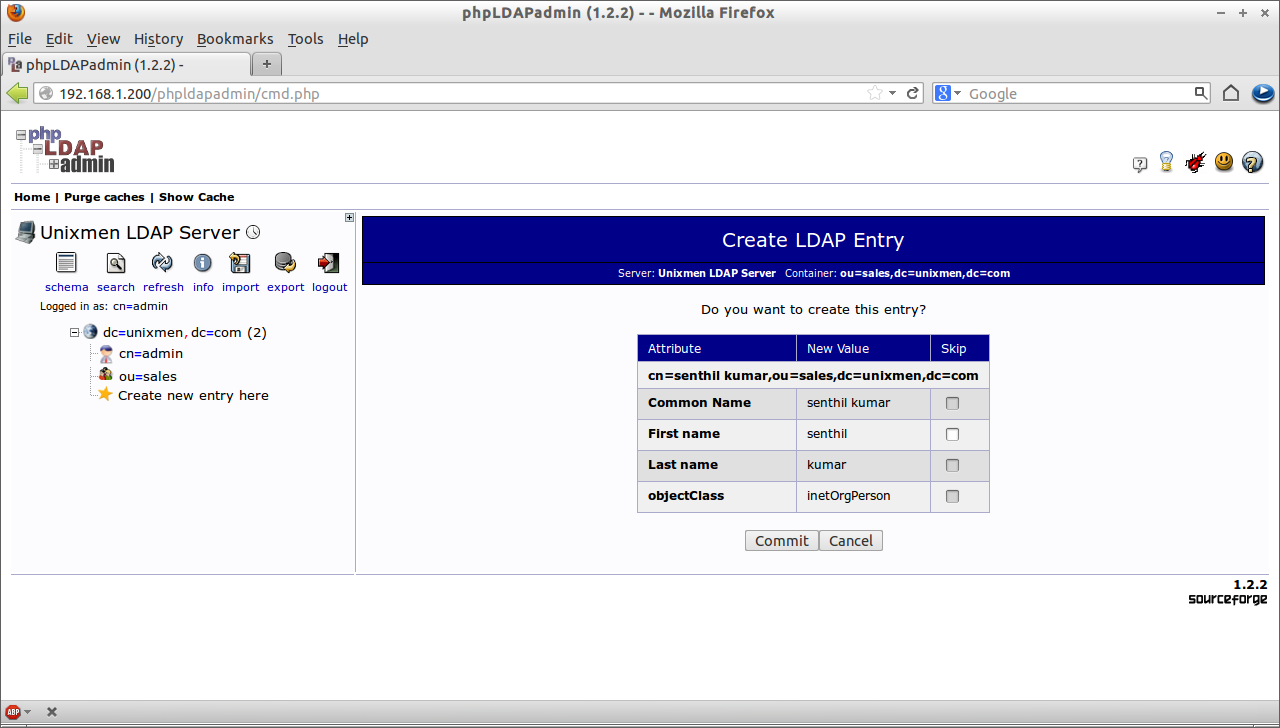
Now the newly created user “senthil kumar” will be found under “sales” ou.

Also you can verify using the command “ldapsearch -x”.
unixmen@server:~$ ldapsearch -x
# extended LDIF
#
# LDAPv3
# base <dc=unixmen,dc=com> (default) with scope subtree
# filter: (objectclass=*)
# requesting: ALL
#

# unixmen.com
dn: dc=unixmen,dc=com
objectClass: top
objectClass: dcObject
objectClass: organization
o: unixmen
dc: unixmen

# admin, unixmen.com
dn: cn=admin,dc=unixmen,dc=com
objectClass: simpleSecurityObject
objectClass: organizationalRole
cn: admin
description: LDAP administrator

# sales, unixmen.com
dn: ou=sales,dc=unixmen,dc=com
objectClass: organizationalUnit
objectClass: top
ou: sales

# senthil kumar, sales, unixmen.com
dn: cn=senthil kumar,ou=sales,dc=unixmen,dc=com
cn: senthil kumar
givenName: senthil
sn: kumar
objectClass: inetOrgPerson
objectClass: top

# search result
search: 2
result: 0 Success

# numResponses: 5
# numEntries: 4


相关推荐
OpenLDAP安装与配置(ubuntu-12.04).docx
Openldap在Ubuntu中的安装部署
This document is meant to be used in conjunction with other OpenLDAP information resources provided with the software package and on the project's site (http://www.OpenLDAP.org/) on the World Wide Web...
LDAP是一种非关系型数据库,支持读取数据的速度远胜于老牌的mysql
该文档提供了为在UNIX或者类UNIX的系统上安装OpenLDAP 2.1软件(http://www.openldap.org/software/)提供了一个指南。该文档面向有经验的系统管理员。但是,他可以没有运行一个基于LDAP目录软件的经验。 该文档应该...
--enable-assembler --with-extra-charsets=complex --enable-thread-safe-client --with-big-tables --with-readline --with-ssl --with-embedded-server --enable-local-infile --with-plugins=partition,innobase...
Open-source OpenLDAP directory server is included in all major Linux distributions; many open-source and proprietary applications can use OpenLDAP's services. Client applications use LDAP to connect ...
DR $ docker run --name openldap bitnami/openldap:latestDocker撰写$ curl -sSL https://raw.githubusercontent.com/bitnami/bitnami-docker-openldap/master/docker-compose.yml > docker-compose.yml$ docker-...
OpenLDAP Directory Server 综合解决方案3
OpenLDAP Directory Server 综合解决方案1
OpenLDAP Directory Server 综合解决方案2
OpenLDAP Directory Server 综合解决方案4
db-4.7.25.tar.gz freetype-2.3.5.tar.gz ...openldap-2.4.38.tgz php-5.2.9.tar.gz phpldapadmin-0.9.8.5.tar.gz zlib-1.2.8.tar 包含上述安装包,都是源码包,通过编译安装,在CentOs5.0下运行通过
主要描述了在Windows环境下安装OpenLDAP的步骤,以及简单的使用方法。同时,给出了一个与Tomcate配置的例子,具体操作了不同用户下的访问权限问题。
MDB: A Memory-Mapped Database and Backend for OpenLDAP
osixia / openldap-backup 最新版本:1.5.0- | 一个用于运行OpenLDAP并进行定期备份的docker映像。 进阶使用者指南 扩展osixia / openldap-backup:1.5.0映像 制作自己的openldap备份映像 测验 Kubernetes 引擎盖...
官方离线安装包,亲测可用。使用rpm -ivh [rpm完整包名] 进行安装
openldap在linux的安装步骤与流程
文档完整的提供了在Linux环境部署OpenLDAP的操作步骤,包括OpenSSL/Gnutls加密,双主热备高可用,数据备份/恢复,性能优化以及常见问题的处理。